
Automating workflows with no code using Make
An original guide by Alejandra Tubilla. The Make App allows us to create and automate workflows without writing any code. You can integrate it with third-party applications and trigger actions such as generating Excel files, sending personalized emails, or creating tasks in task managers like Trello or Monday.
There are different licensing tiers for the app, which are based on the number of active scenarios and operations you can perform in a month. The Free plan allows for two active scenarios, 1,000 operations a month, and 15-minute intervals between triggered scenarios. This plan is sufficient to start using and creating our own workflows for demonstration purposes or generating reports for our customers to get started. You can create an account and log in here.
Scenarios
Creating a Scenario
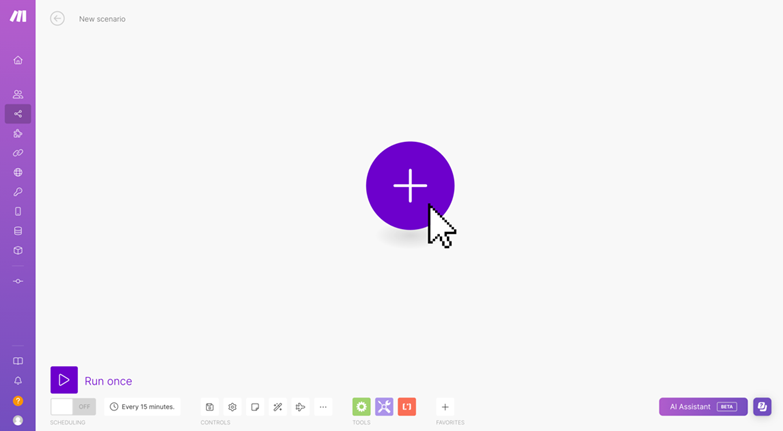
After creating the account, you can proceed to create a new Scenario. Inside the scenario is where we design the workflow and include all tasks we wish to accomplish. Different tasks can be triggered within the same scenario, but they should be kept separate if they are to be triggered at different times. You have the option to create your scenario from scratch, or you can explore the various templates available. These templates can assist in replicating someone else’s workflows or provide ideas on what can be achieved.
-
In the dashboard, select “+ Create a new scenario”

-
Once the scenario was created you will be redirected to a new window where you can start your workflow by selecting the App that will be your starting point.

Adding an Application to a workflow
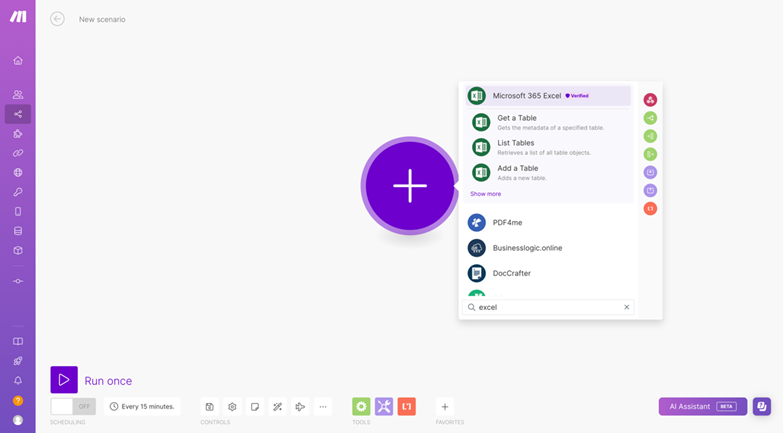
The first application you add will serve as the starting point for your workflow. It can be triggered by a webhook alert or email received, as well as an API call to run a specific report.
-
Click in the “+” Icon ( ) (1) to view the list of apps available

-
You can use the search bar to find a specific app. Once you select the app, choose the specific action needed within the app. For example, extracting information from a table within an Excel worksheet.
-
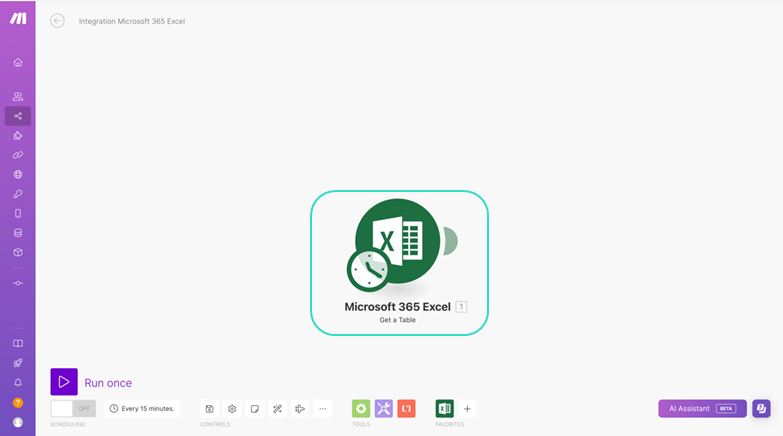
Once you select the application, the clock icon indicates that this is the starting point. You can always select a different application to be the starting point as you work through your workflow.
-
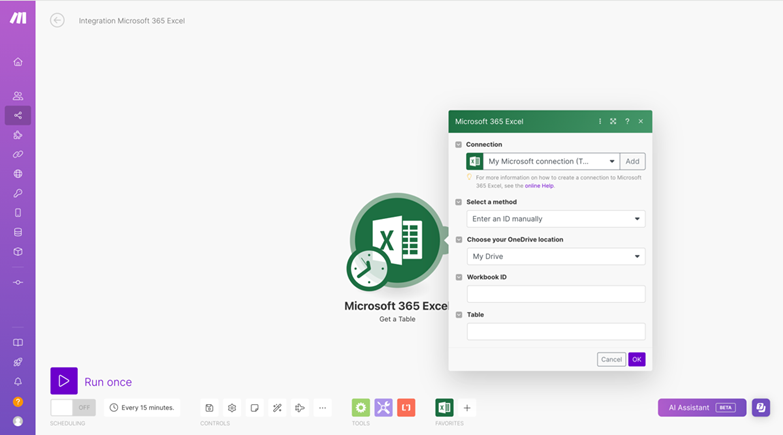
After selecting the application, you must click on the app icon, in this case, the Excel logo, to configure it and make the connection between the Make App and your chosen application.
Programming Runtimes
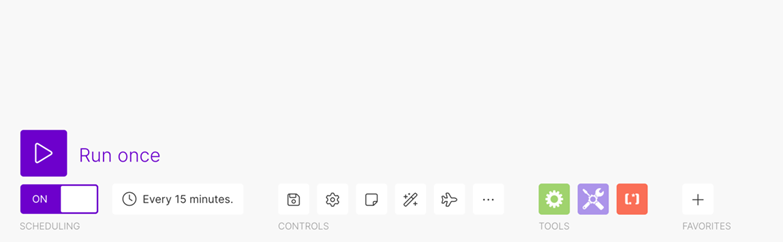
Running times will determine the frequency at which the scenario will be run.
-
You must first save your scenario before configuring it. To save, click on the save button.

-
You have the option of running the scenario once. This allows you to test your connections, as well as performing a one-time run, which might be useful when generating reports at a specific point in time. To do so, click on the play icon “Run once”.
-
There is also the option of scheduling when to run the scenario, to configure this option click on the “Every 15 minutes” button, as this is the default interval.
-
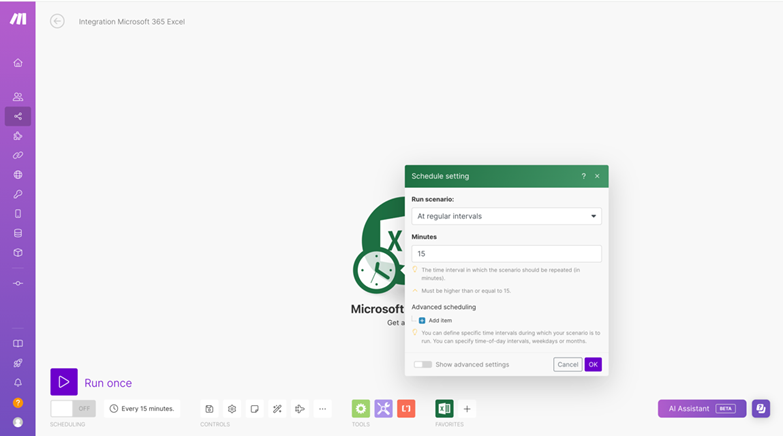
After selecting that option, a window will appear with the “Schedule setting”, offering you the choice of when to “Run scenario”. You can select from the provided options and customize the times or choose “Advanced scheduling” for more customizable options.
-

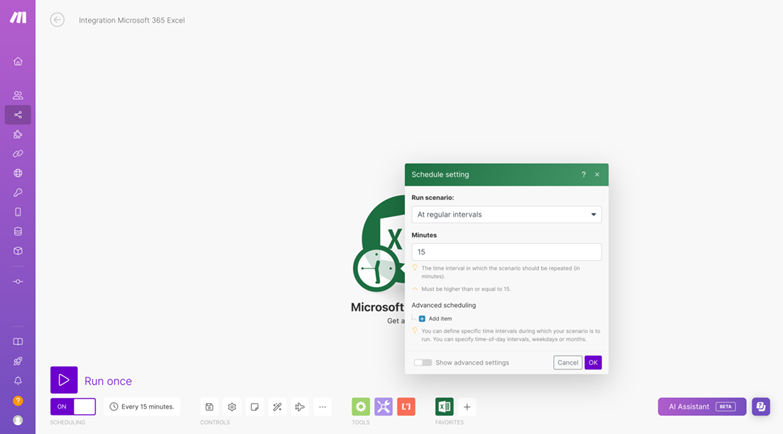
Once you selected the options, click on the Ok button and click on the toggle button to turn on the scenario.
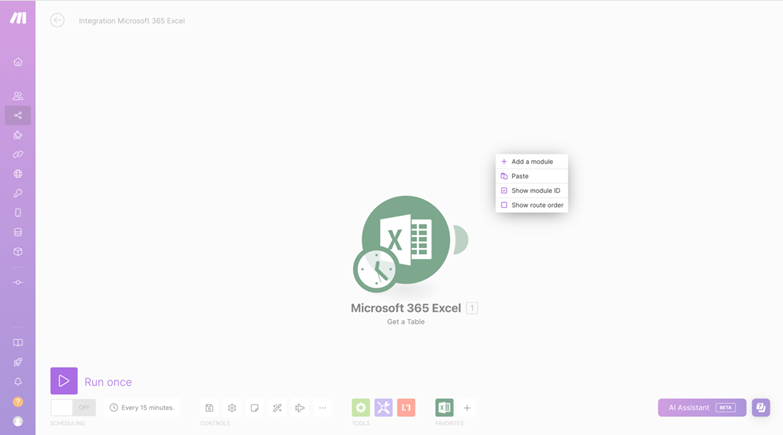
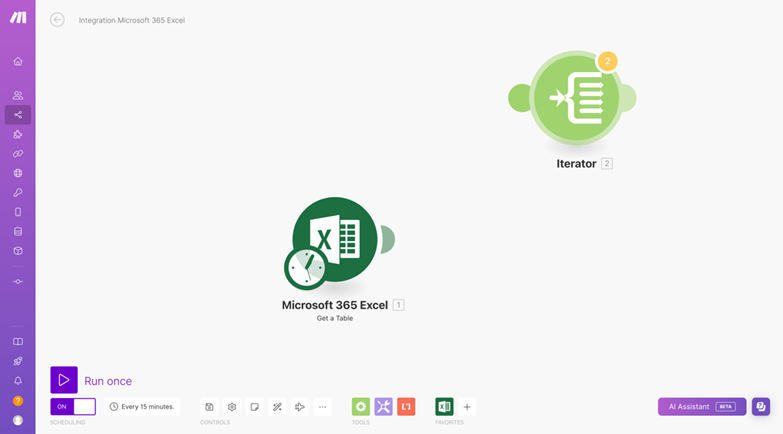
Adding a new moduleYou can add as many modules as needed to your scenario. To add a new one, right click to view the options and select “+ Add a module”. A second bubble will appear and clicking in the + icon you will be able to select the desired application. (Follow the instructions detailed before in the “Adding an application to the workflow” section)

-
Connecting Modules
-
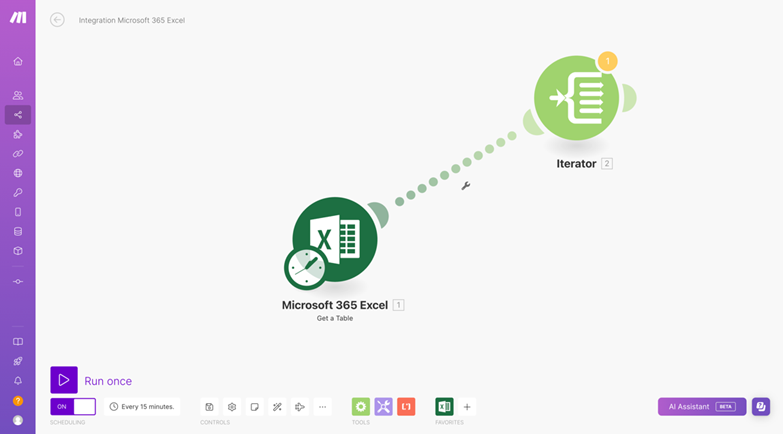
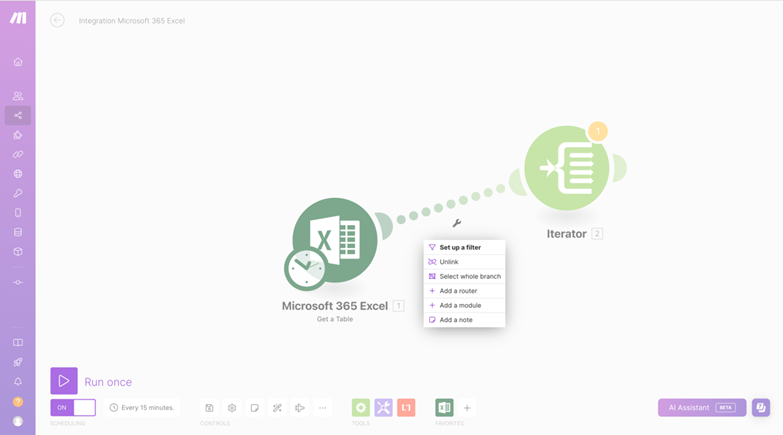
When you need to link different modules, select one of the smaller bubbles representing a module, and drag it to the module you want to connect it to. Once you have reached the desired module, release the bubble, and the link will be created.

-
You can create filters to add conditions to the links, ensuring they are triggered only when specific criteria are met. To do so, click on the tool icon and select the “Set up a filter” option.
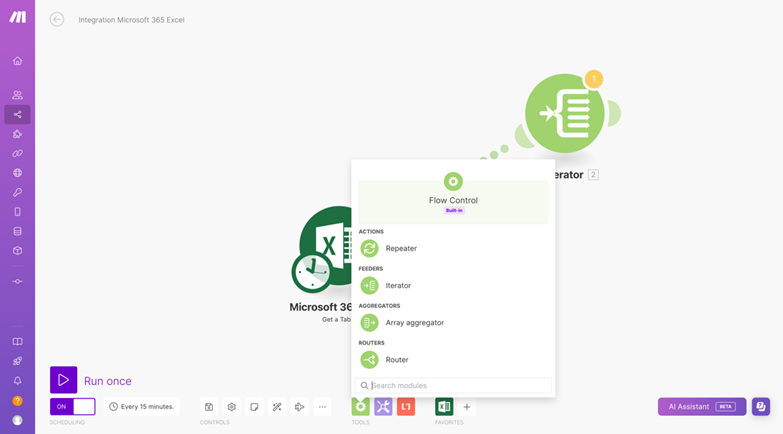
Flow Control
The “Flow Control” option provides you with the tools necessary to perform actions traditionally used in programming, enabling you to work through workflows, extract data, and manipulate it. For more information visit the official documentation
-
To see the Flow Control tool options, click on the Settings Icon, and a list of actions will be displayed.

-
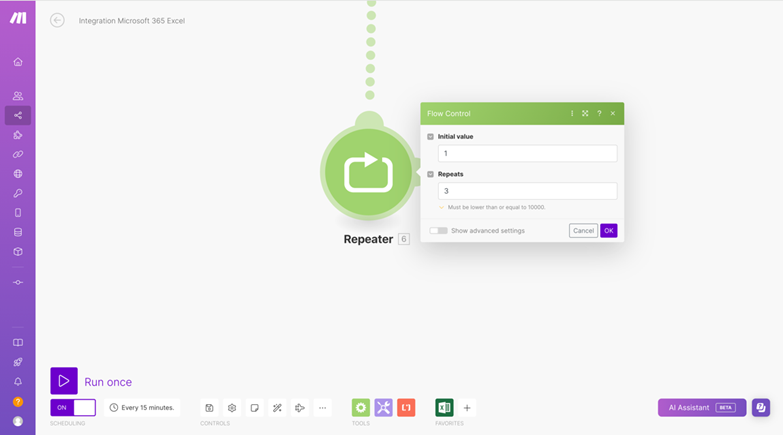
The “Repeater” action allows you to repeat the same actions as many times as needed. This module should be added before the action you want to repeat.
-
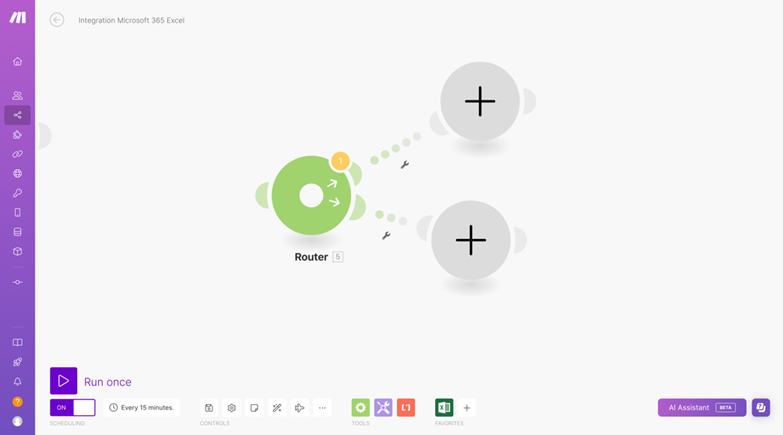
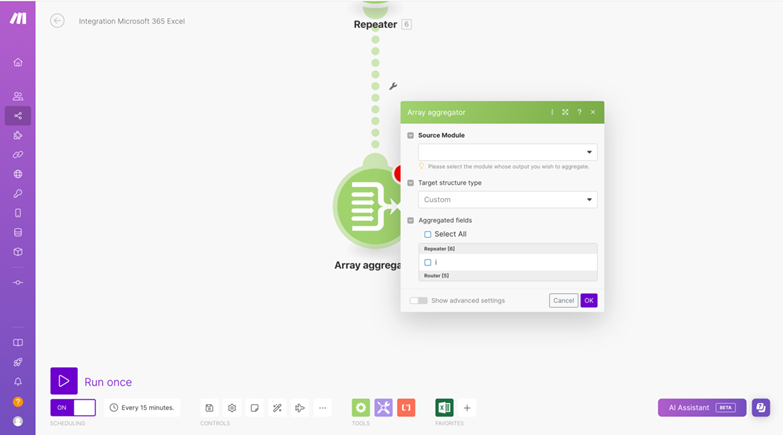
The “Router” is used to branch the scenario into multiple processes from a single module. This eliminates the need to create multiple scenarios and repeat the same process. For example, when generating an access token, you can perform multiple API calls using the one generated.
-
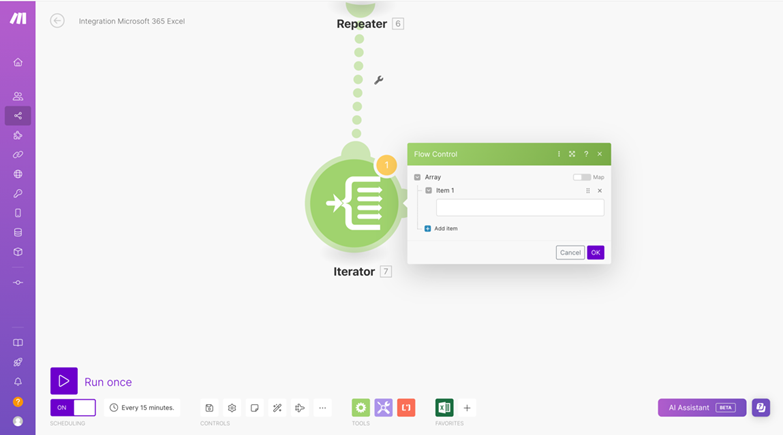
The “Iterator” can be used to go through an array and perform an action on each piece of data.
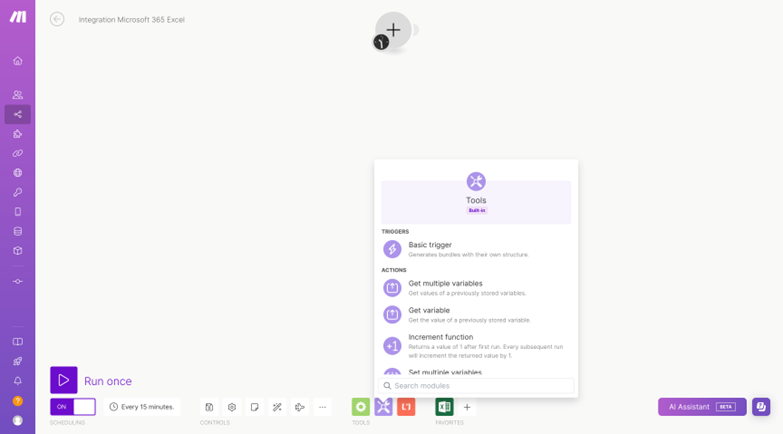
Tools
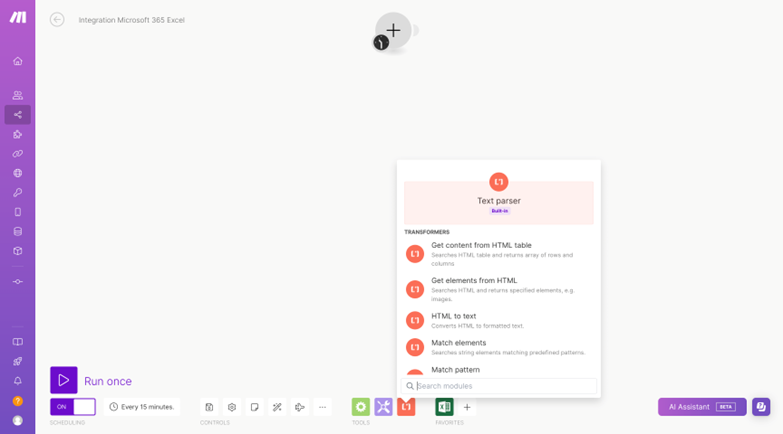
Text Parser
Updated 11 months ago
Now that you've learned how to use make, let's put it into practice!