
Working with Library Profiles
How to use library profiles to apply configuration
Overview
This section of our configuration guide assumes knowledge of library profiles and scope IDs. If you are not yet familiar with these topics please first review our library profile and scope ID guides. In Central, configuration profiles are assigned to scopes within the hierarchy to apply the configuration. For example, assigning a WLAN SSID profile to a site scope will apply said WLAN configuration to every applicable device function in the site.
Assigning Library Profiles
Profiles can be applied to scopes in the Central UI or through API. For both methods you will need to designate a device function and a scope for your profile. The device function will designate which type of devices the profile will be applied to. The scope will designate which level of the hierarchy the profile will be applied to.
Assigning with Central UI
-
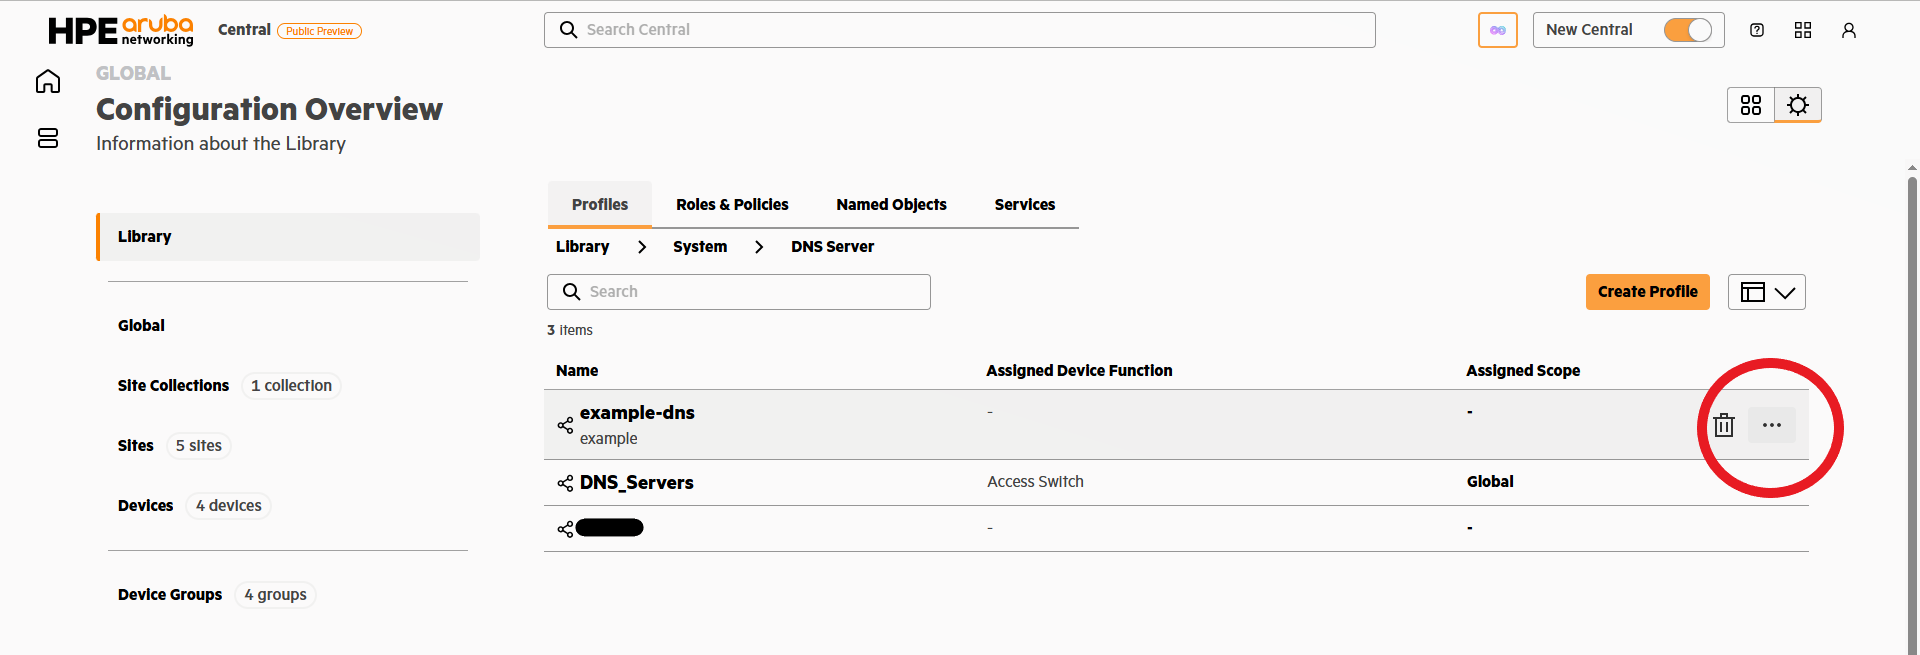
Navigate to a profile management card in the library and find the three menu dots at the end of the row
-
Expand the menu and select assign
-
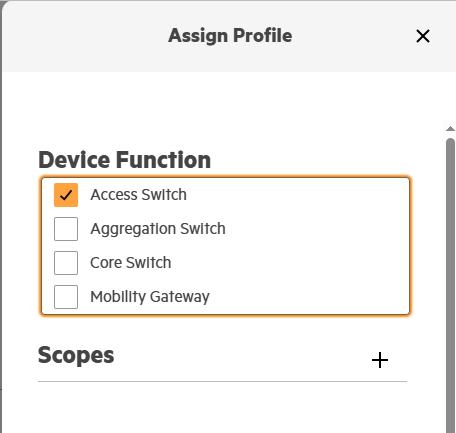
Select a device function
-
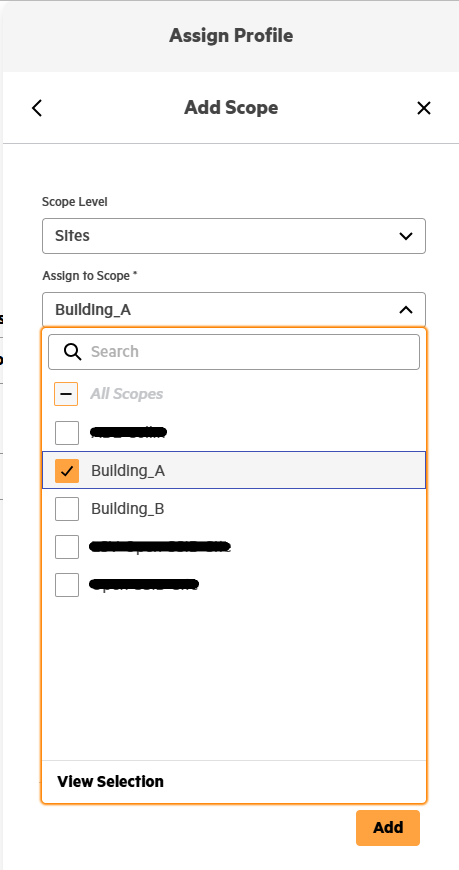
Select a scope level and scope
-
Finish by pressing the 'Add' button
Profiles are flexibleA profile can be assigned to multiple device functions and scopes using the same workflow.
Assigning with Central API
To assign profiles to scopes using the Central API we will use the Config Assignments endpoint. This requires gathering preliminary information to provide in the API payload including the scope ID, device function, profile type, and profile instance. For more information about working with Central API please visit our Getting Started with REST APIs guide. You can get started quickly with APIs using our Postman Collection guide.
- Get the scope ID for the designated scope to assign a profile to. Please reference our Scope ID guide for full details on this process.
- Designate the device function. Please reference our Device Function guide for a full table of device functions and their equivalent API values.
- Define the profile type. The profile type is the API endpoint value equivalent of the profile category in the UI. For example the equivalent API endpoint for creating a WLAN category UI profile would be the
/wlan-ssidsendpoint. Thus, the "profile-type" value would be "wlan-ssids". The easiest way to determine a profile type is to reference the Configuration API Reference for individual endpoints. Alternatively, make a profile assignment in the UI, then Retrieve config-assignments to see what "profile-type" value is returned for the assigned profile. - Set the profile instance. The profile instance is simply the name of the profile that will be assigned.
Postman Example
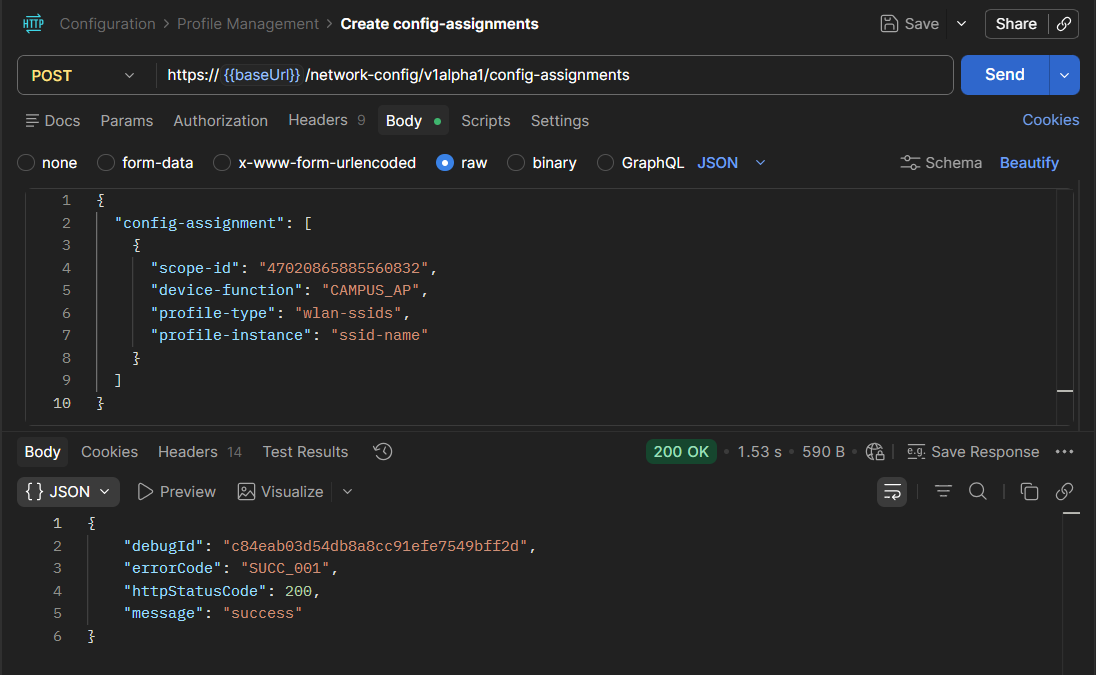
With the above information gathered we can populate the information required in the config-assignments API payload. Here is an example using postman for assigning a WLAN profile with the name "ssid-name" to a scope for Campus Access Point device functions.
Postman WLAN example
Curl Example
curl --location 'https://{{baseUrl}}/network-config/v1alpha1/config-assignments' \
--header 'Content-Type: application/json' \
--header 'Authorization: Bearer {{bearerToken}}' \
--data '{
  "config-assignment": [
    {
      "scope-id": "47020865885560832",
      "device-function": "CAMPUS_AP",
      "profile-type": "wlan-ssids",
      "profile-instance": "ssid-name"
    }
  ]
}'
Upon receiving a successful response our Library Profile is now properly assigned to our scope!
Retrieving Profile Assignments
Once a library profile has been assigned, retrieving profile assignments with the Central API is simple. Use the Config Assignments endpoint like was shown to assign the profile, but make the request using the HTTP GET method instead of POST. This endpoint method supports query parameter filters for scope ID, device function, and profile type. This API will return the details of all shared config assignments currently established in Central. The returned details include scope ID, device function, profile type, profile instance, scope ID, and scope name.
Postman Example
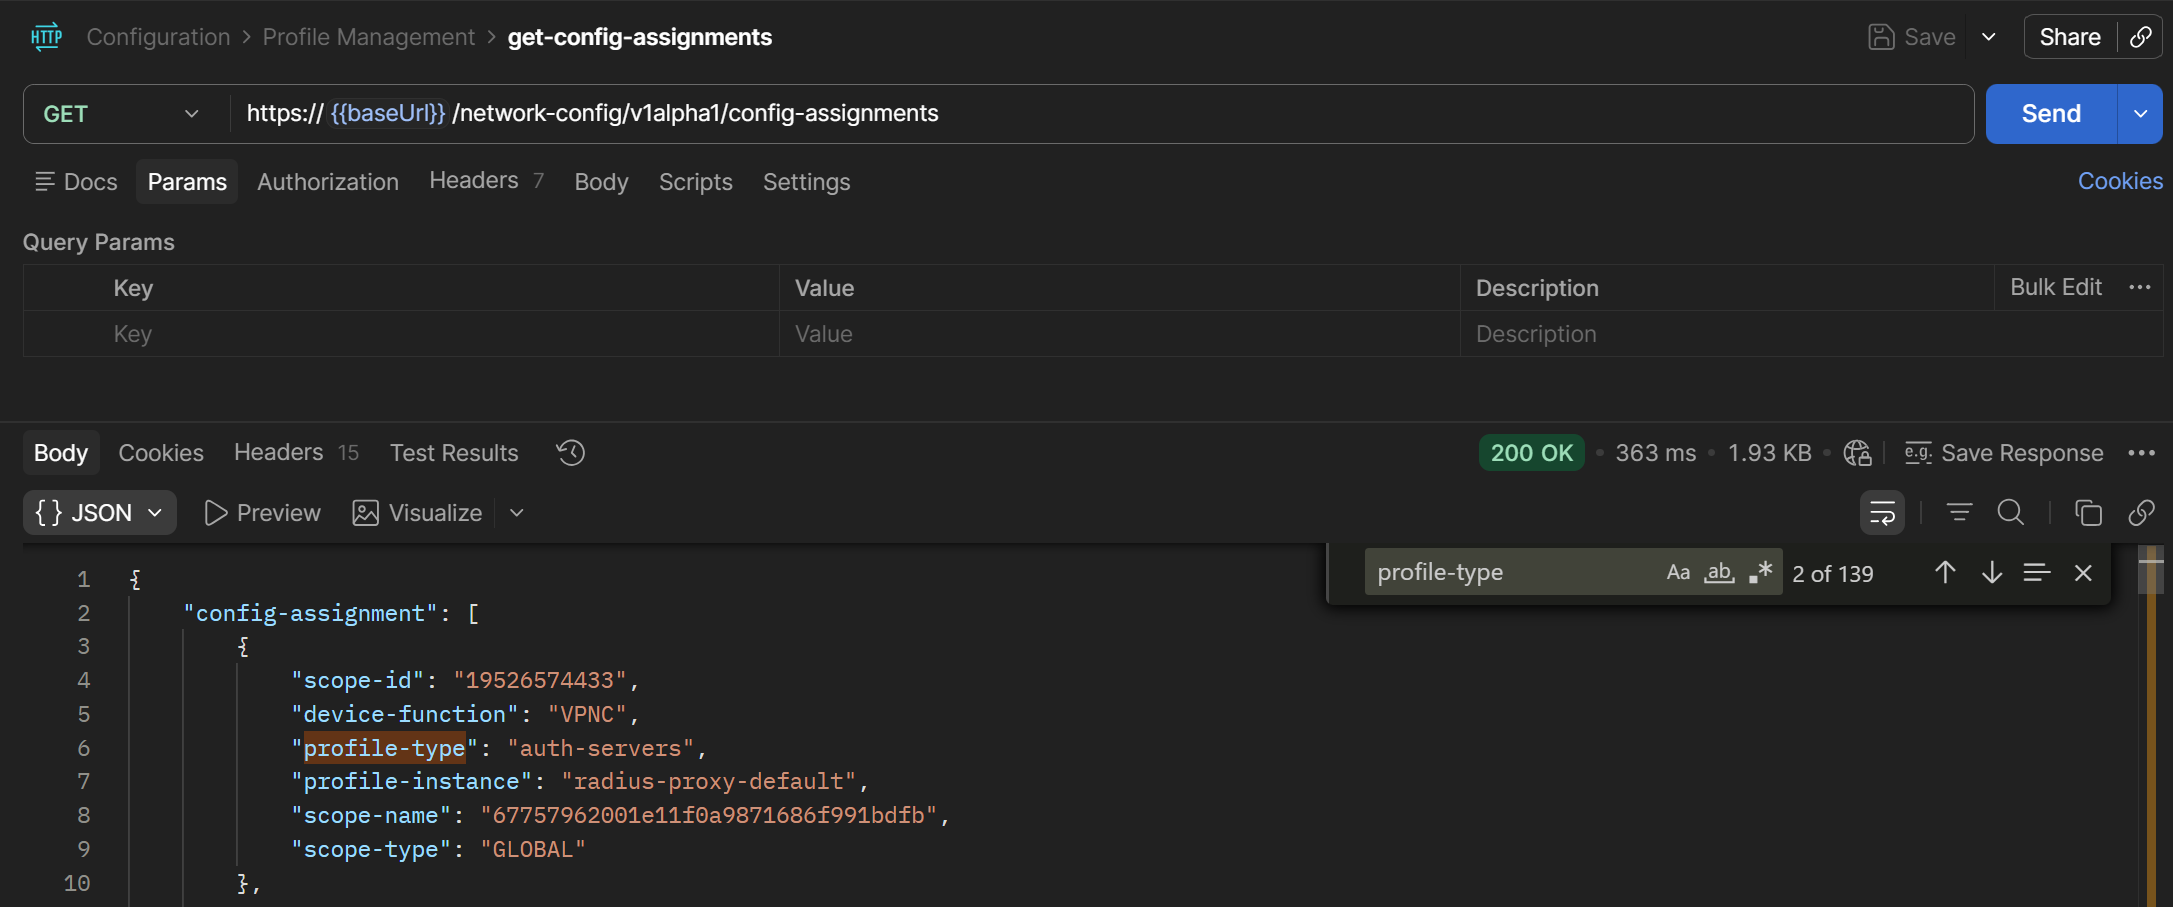
Postman Retrieve Config Assignments Example
CURL Example
curl --location 'https://{{baseUrl}}/network-config/v1alpha1/config-assignments' \
--header 'Authorization: Bearer {{bearerToken}}'
400 Bad Request400 error response codes can result from using the full path parameters including information such as scope ID, profile type, etc... Make sure to use only the resource path endpoint as shown in the example - '/config-assignments'
Library Profiles OnlyThe config assignments API currently does not support returning local profiles for GET operations, only library profiles.
Unassigning Library Profiles
Unassign with Central UI
-
Navigate to a profile management card in the library and find the three menu dots at the end of the row
-
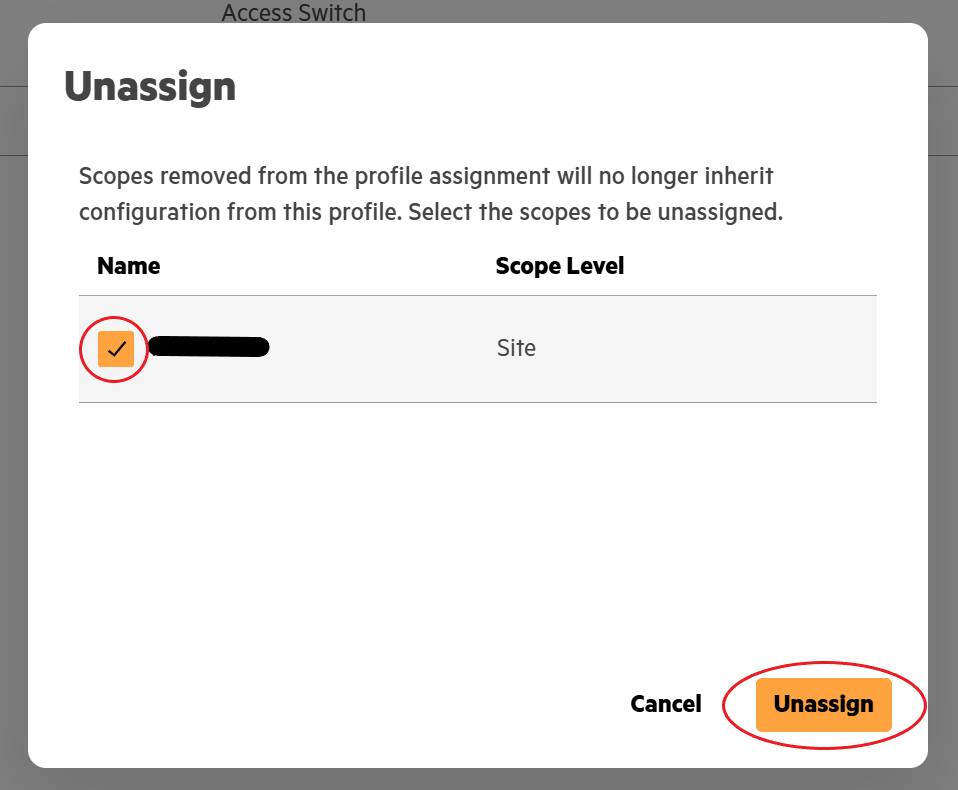
Click the option to unassign which will make a popup windows appear. Next check the box of the scope name that you would like to unassign. Finally, confirm with the unassign button.
Unassign with Central API
Unassigning a profile with Central API is slightly different than creating. Follow the same instructions for assigning with API to gather the required information. Except, instead of using the gathered information in the body of the request, we will use them as path parameters.
Postman Example

Postman Unassign Config Assignments Example
Curl Example
curl --location --request DELETE 'https://{{baseUrl}}/network-config/v1alpha1/config-assignments/{{scopeId}}/{{deviceFunction}}/{{profileType}}/{{profileInstance}}' \
--header 'Authorization: Bearer {{bearerToken}}'
Updated 28 days ago
What’s Next
Now that you've explored working with Library Profiles, check out working with Local Profiles